
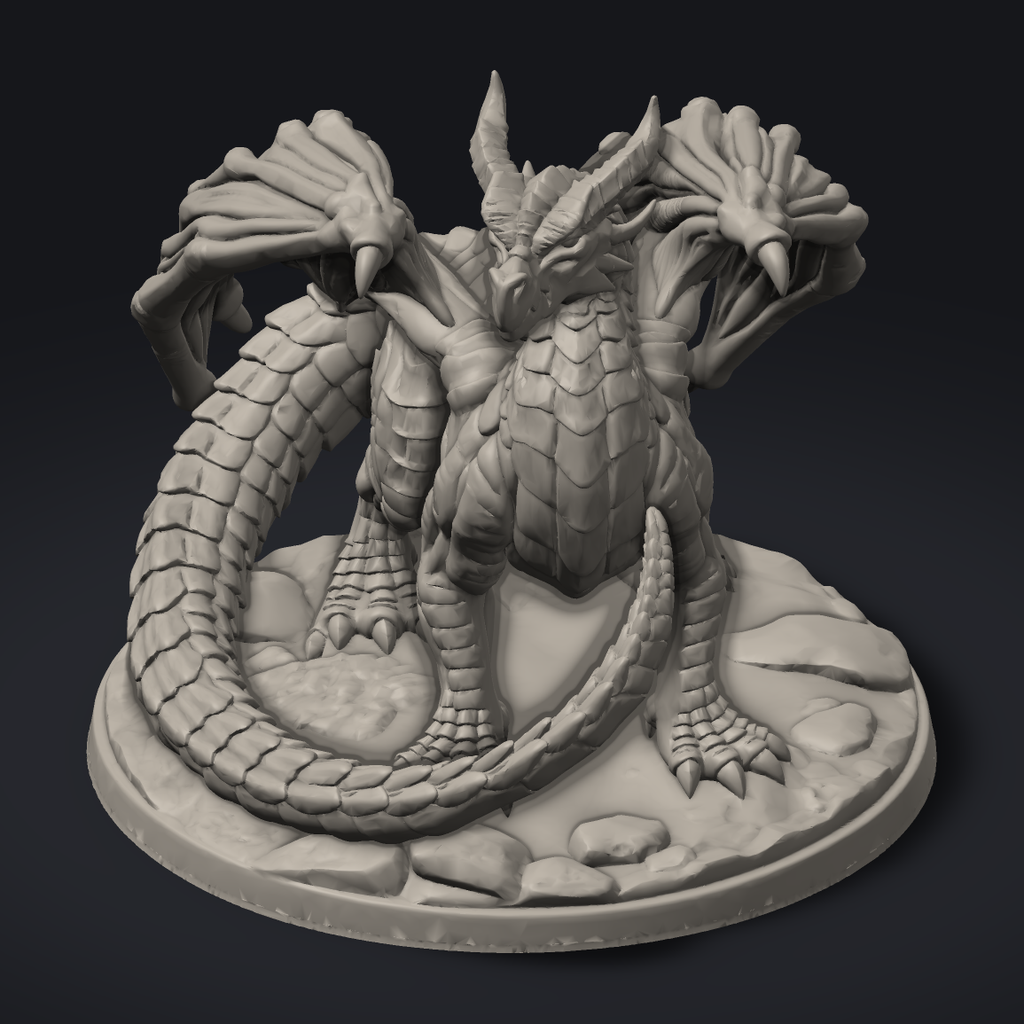
Regal Teenage Dragon: Red Scale Zenithal Guide
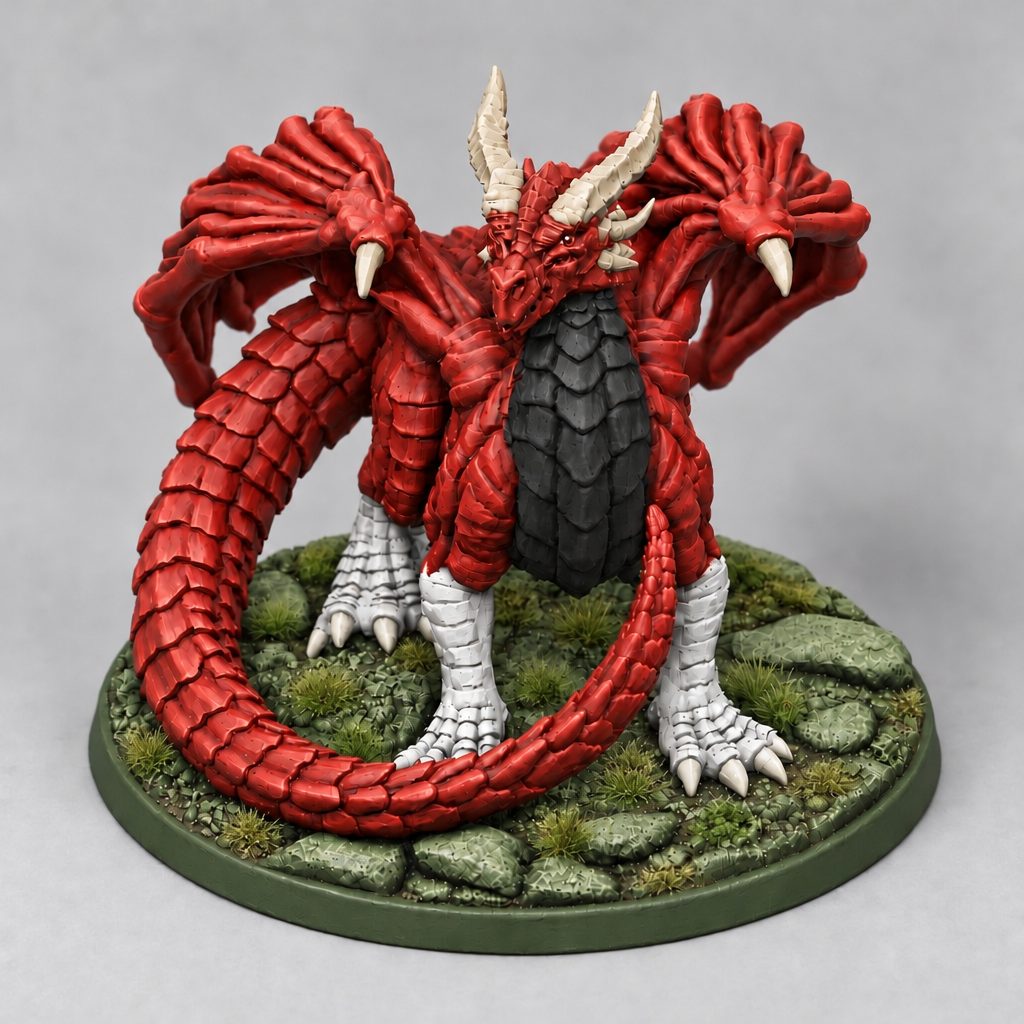
A red-scaled dragon on a rocky forest-green base, painted with a zenithal underpaint, scarlet scales with red-brown recess washes, ivory horns and claws, and a dark-shaded belly. The finished look is a crisp, high-contrast red dragon with bright edges and a green-tinted rocky base.
Prime black, then grey and white from above; thin colour lets the light show through.
Guide by @tbrianjones · Oct 27, 2026 · Version 1Colour scheme
| Area | Colour | Paints |
|---|---|---|
| Body scales | Red | Scarlet (base)Red-brown wash (shading)Scarlet highlight (edges) |
| Wing membranes | Red | Scarlet (base)Red-brown wash (shading)Scarlet highlight (edges) |
| Wing claws | Bone | Ivory (base)Sepia (light brown) wash (shading)Pale ivory (edges) |
| Tail | Red | Scarlet (base)Red-brown wash (shading)Scarlet highlight (edges) |
| Horns and head spines | Bone | Ivory (base)Sepia (light brown) wash (shading)Pale ivory (edges) |
| Head and snout | Red | Scarlet (base)Red-brown wash (shading)Scarlet highlight (edges) |
| Legs and claws | White | Cool white (base)Light grey wash (shading)Pure white (edges) |
| Belly underside | BlackNever highlight black with white. | Soft black (base)Black wash (shading)Slate grey (edges) |
| Base ground and rocks | Forest | Forest green (base)Green wash (shading)Pale moss (edges) |
What you need
- Black spray primer
- White spray primer (or brush-on white)
- Medium flat brush (size 1 or 2)
- Fine detail brush (size 0 or 00)
- Old stiff brush for stippling
- Glaze medium or water for thinning
- Gloss and matt varnish
- Static grass or flock for tufts (optional)
- Texture paste or PVA for the base
Safety
Spray primer and varnish outdoors or in a well-ventilated space, and keep the can away from heat.
- 20 min hands-onwaits 3 h insidethen dry 30 minOld stiff brush
Step 1 of 9 · Texture the base and prime black
Texture the rocky base, then prime the whole figure black from above.
 I printed this onPrinted on resin:
- Wearing nitrile gloves, wash it in isopropyl alcohol (IPA) for 2–5 minutes in two baths, dirty then clean, or in water if the resin's label says it is water-washable. Don't leave it soaking much longer.
- Let the alcohol dry off for at least 30 minutes (a fan helps); water-washed prints need longer.
- If the print is hollow, check it has drain holes and no liquid resin trapped inside, which leaks or cracks the print later.
- Snip the supports while it is still slightly soft, then post-cure it under UV, turning it halfway. Don't over-cure thin parts: they go brittle.
- If it is still tacky after curing, wash it again rather than curing longer.
- Sand support scars wet with 400 grit, never dry. No filler primer: it fills the fine detail. Spray primer or a brush-on primer both grip cured resin.
- Leave dirty IPA in a closed clear jar in sunlight until the resin settles out solid; never pour it down the drain.
Safety: Wear nitrile gloves until the print is washed and cured, keep IPA away from flames, and wear a mask when sanding even wet.
On this piece: Check the wings, the long thin tail, the horn tips and the claws, which are likely support spots and fragile once painted. Glue or texture the rocky base before priming so the rock detail survives; the wing membranes and tail spines are the parts to handle most carefully.
- 1Brush texture paste or PVA onto the base rocks and let it set overnight.
- 2Spray the whole figure and base with black primer from above and from the sides, turning it between passes.
- 3Make sure the underside of the belly, the wing folds and the gaps between the legs and tail are covered.
Paints- White glueBase ground and rocks: Brush over the rocks to seal and add grit
- Black spray primerwhole piece
Tips- Spray in light coats so the scale detail is not filled in.
- Spray the grey and white within about an hour of the black, or wait until the next day: some hardware-store primers wrinkle if recoated in between.
Avoid: Priming before the texture has set, which lifts the paste off the base.
When it's done: The whole figure and base are matt black with the rocky texture showing on the base.
- 20 min hands-onthen dry 30 min
Step 2 of 9 · Zenithal grey and white underpaint
Light the figure from above with grey, then white, walking all round it.
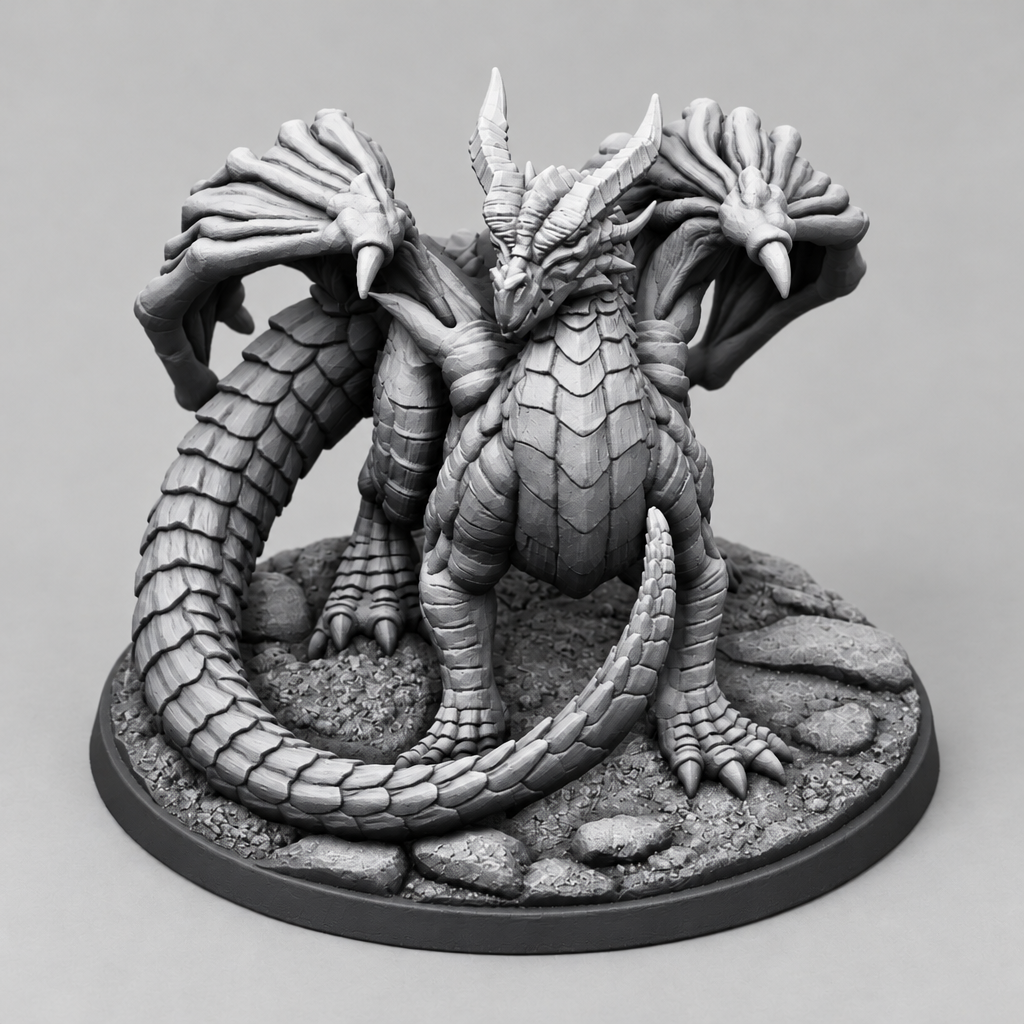
- 1Spray grey primer from about 45 degrees, walking all the way round the figure.
- 2Spray white from 30 to 45 degrees above, again all the way round.
- 3Let the upper third to half of every wall and scale go white, fading to black at the foot and in the recesses.
Paints- Mid greywhole piece
- White spray primerwhole piece
Tips- Keep the belly and under the wings black for depth.
Avoid: Spraying only from overhead, which leaves the sides flat and grey.
When it's done: The figure is grey-to-white on its upper surfaces, fading to black in the recesses and undersides.
- 55 min hands-onthen dry 20 minMedium flat brush
Step 3 of 9 · Scarlet body and wings
Block in the scarlet scales, wing membranes and tail with thinned colour.
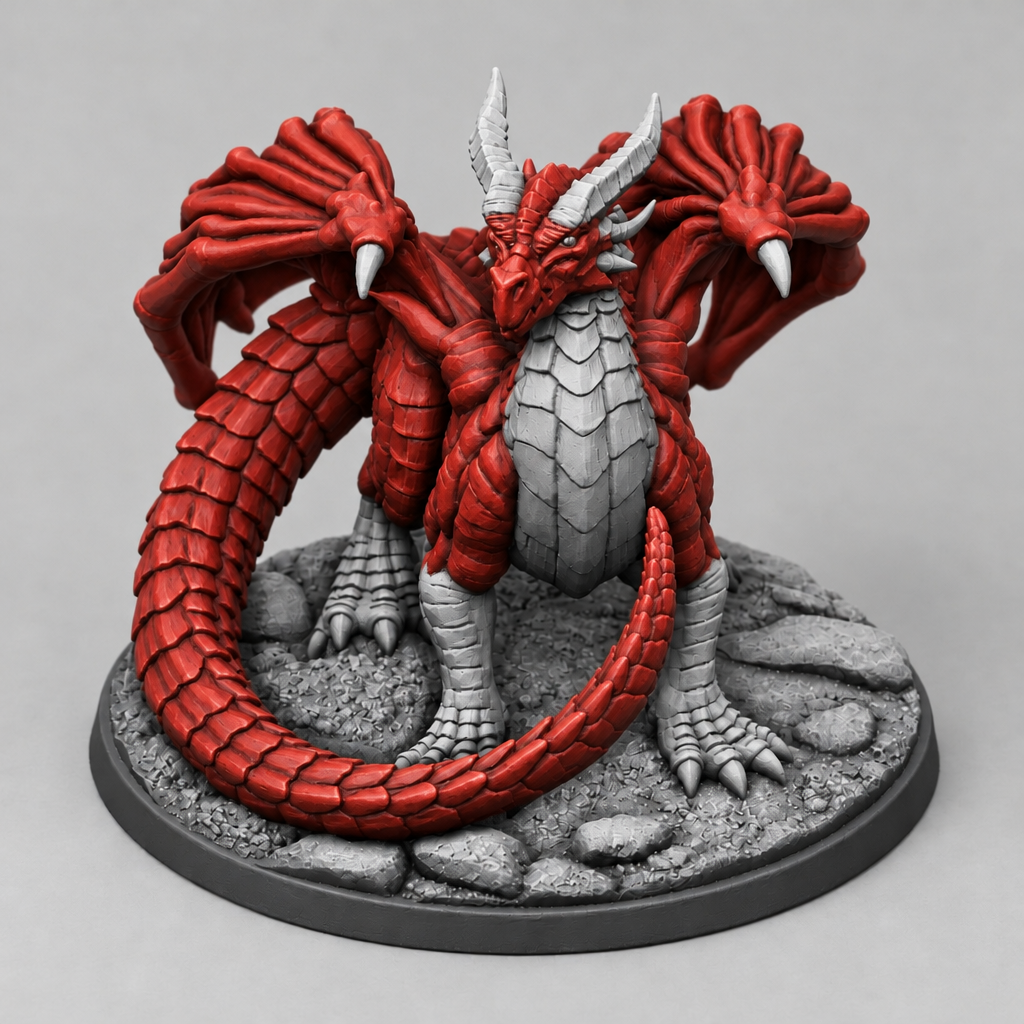
- 1Thin scarlet with water or glaze medium and apply it over the body scales in thin coats, letting the white show through.
- 2Carry the same scarlet over the wing membranes, tail and head, keeping the glaze thin on the upper surfaces.
- 3Work the recesses and under-scale gaps with darker coats so the zenithal depth stays.
Paints- ScarletBody scalesWing membranesTail: Scarlet along the tailHead and snout: Scarlet on the head and snout
Tips- Use two or three thin coats rather than one thick one.
Avoid: Painting opaque scarlet that hides the zenithal white entirely.
When it's done: The scales, wings, tail and head are glazed scarlet, with the white light visible on the upper surfaces and black in the recesses.
- 35 min hands-onthen dry 20 minFine detail brush
Step 4 of 9 · Ivory horns and claws
Paint the horns, spines, wing claws, legs and claws in ivory and cool white.
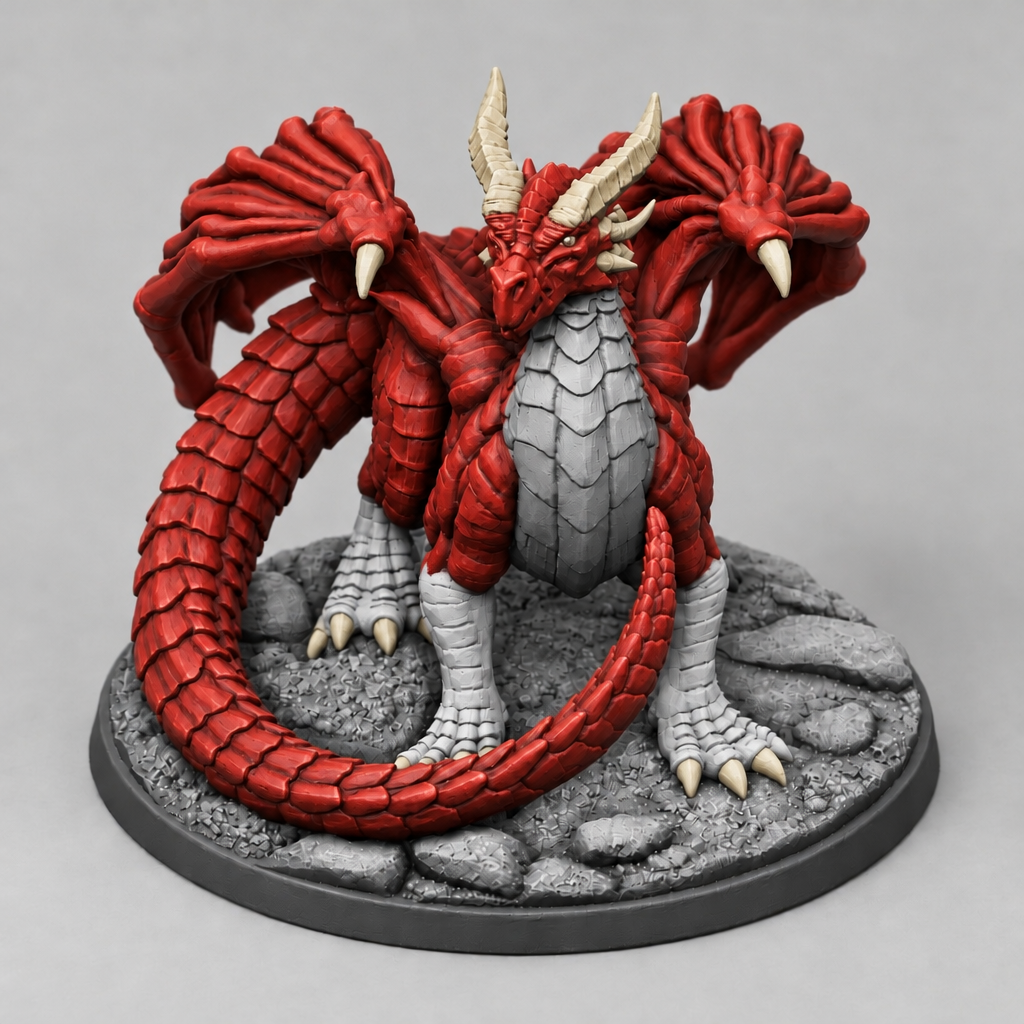
- 1Paint the horns and head spines in ivory, keeping the tips clean.
- 2Paint the wing claws in ivory, one at a time.
- 3Paint the legs and claws in cool white, working each claw separately.
Paints- IvoryHorns and head spinesWing claws
- Cool whiteLegs and claws
Tips- Rotate the figure so each claw is reached from above.
Avoid: Painting the claws in a messy blob, losing their separate shapes.
When it's done: Horns, spines and claws are ivory; the legs are cool white.
- 35 min hands-onthen dry 30 minMedium flat brush
Step 5 of 9 · Dark belly and wash
Paint the belly black and apply a black wash to deepen the shadows.
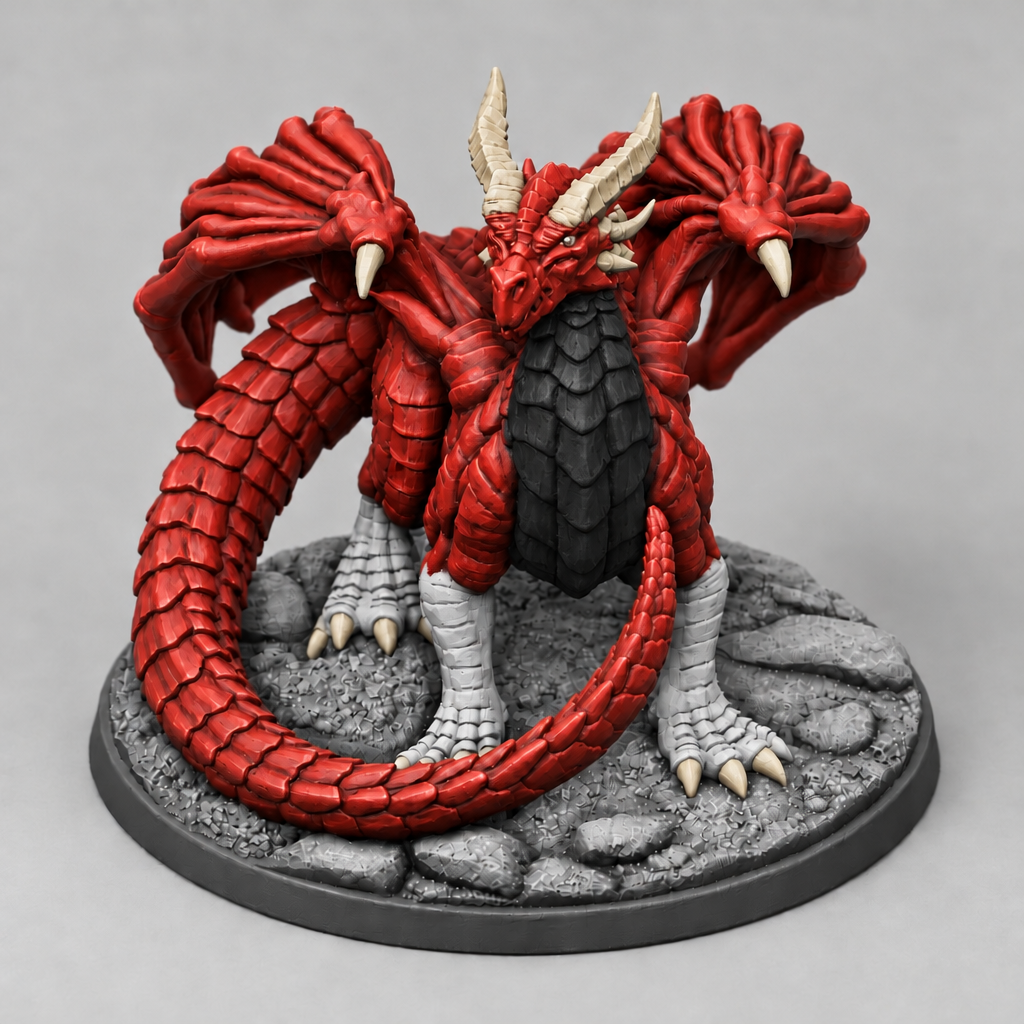
- 1Paint the belly underside in soft black, covering the zenithal black.
- 2Apply black wash into the belly recesses and under the scales.
- 3Wash the legs and claws lightly with the grey wash so the white reads as shadow.
Paints- Soft blackBelly underside
- Black washBelly underside
Tips- Let the wash pool in the recesses rather than spreading on the flat scales.
Avoid: Using a black wash over the scarlet, which muddies the red.
When it's done: Belly is soft black with dark wash shadows; the rest of the body is scarlet with bright white highlights.
- 50 min hands-onthen dry 30 minFine detail brush
Step 6 of 9 · Scarlet and white edge highlights
Highlight the top edges of the scales, wings and tail with bright scarlet and white.
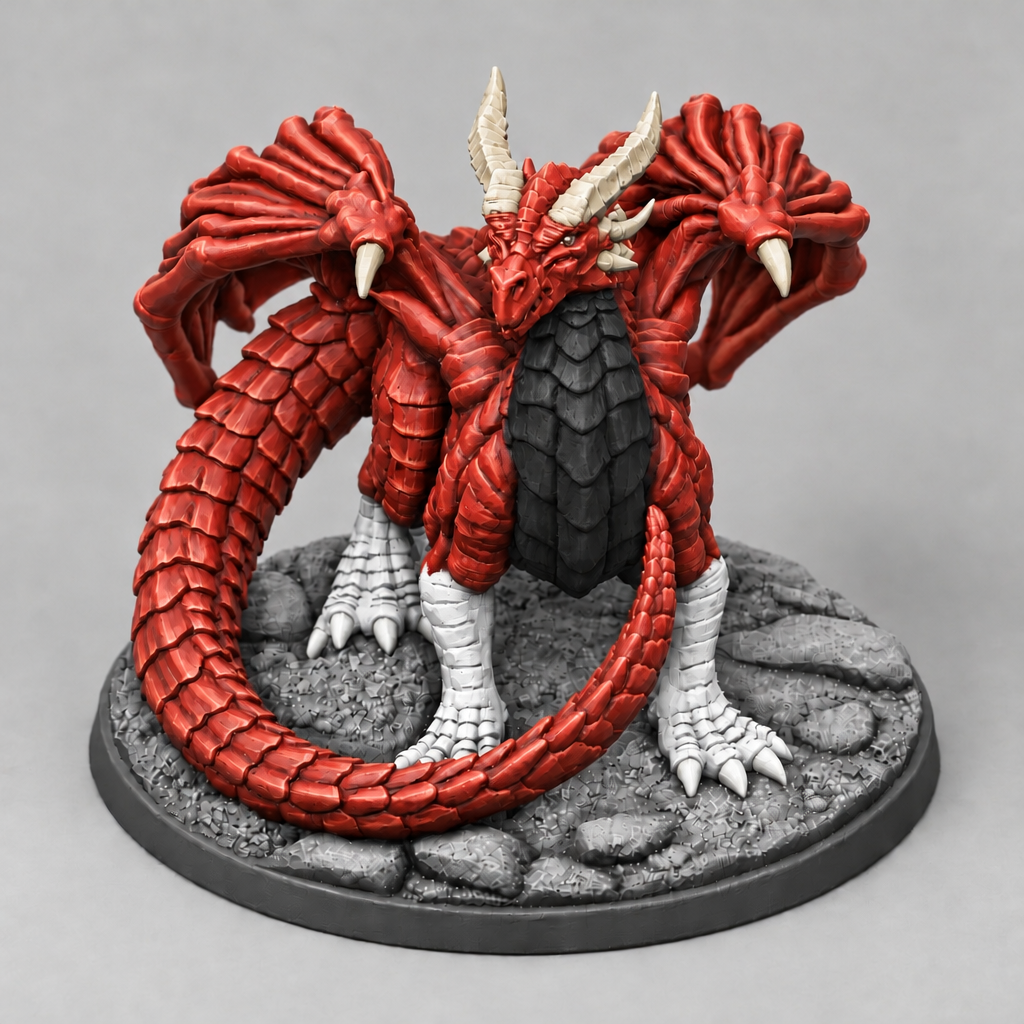
- 1Edge-highlight the top edges of each scale with pale scarlet, keeping the line thin and sharp.
- 2Highlight the wing ridges and tail spines with pale scarlet.
- 3Add pure white to the top edges of the legs, claws and horn ridges.
Paints- Scarlet highlightBody scalesWing membranes
- Pure whiteLegs and claws
- Pale ivoryHorns and head spines
Tips- Highlight only the edges that face the light.
Avoid: Making the edge highlight too wide, which flattens the scale shape.
When it's done: Scales and wings have bright pale scarlet edges; the legs and horns have white and ivory highlights.
- 25 min hands-onthen dry 10 minFine detail brush
Step 7 of 9 · Eyes and final details
Paint the eyes and tidy the claws and spines.
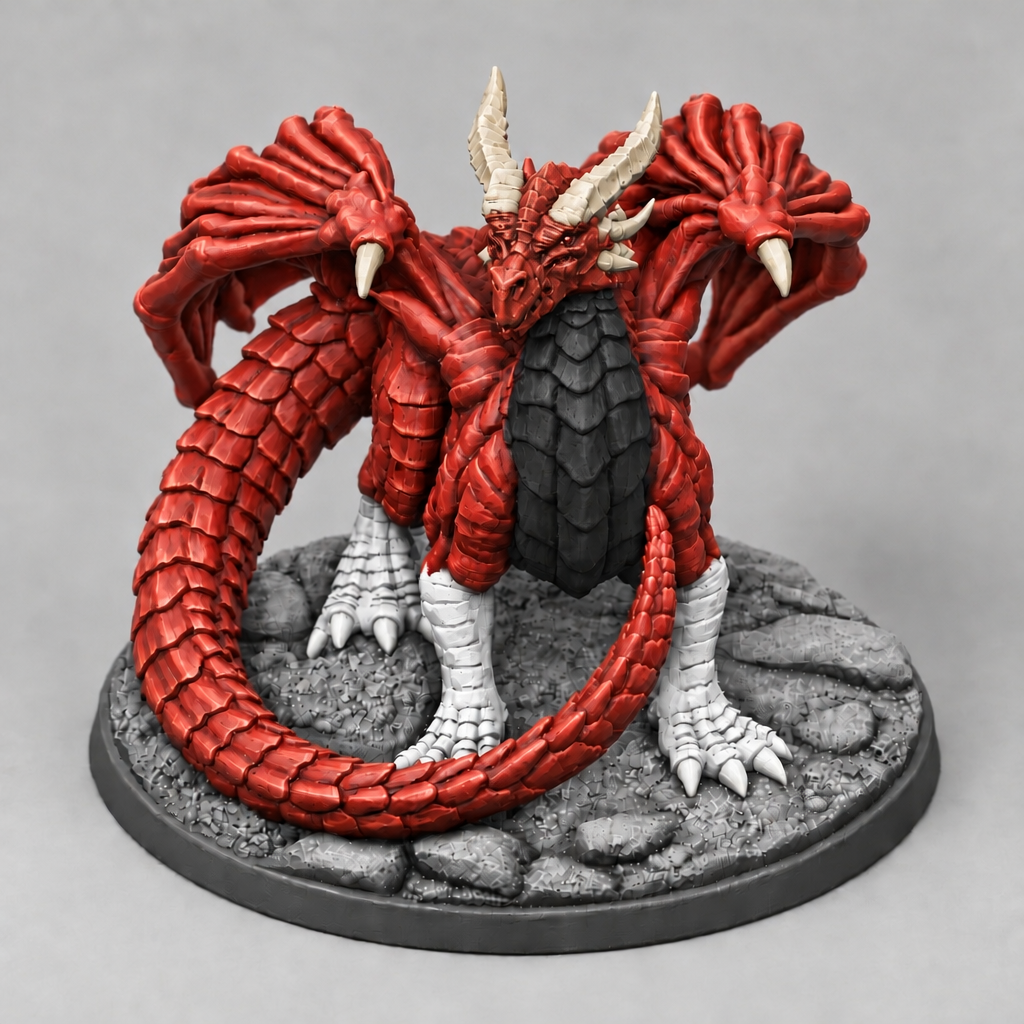
- 1Add a light red dot for the eye and a red-brown pupil, both looking the same way.
- 2Tidy any scarlet that has crept onto the claws and spines.
Paints- Deep scarletHead and snout: Dark red socket around the eye
- Light scarletHead and snout
- Red-brown washHead and snout
Avoid: Using black for the lips or a large eye, which looks cartoonish.
When it's done: Eyes are dark-socketed with a light red dot and red-brown pupil; claws and spines are clean.
- 40 min hands-onthen dry 2 hOld stiff brushGood place to stop
Step 8 of 9 · Forest-green rocky base
Paint the rocks forest green, wash them, drybrush the top with pale moss, and seal.
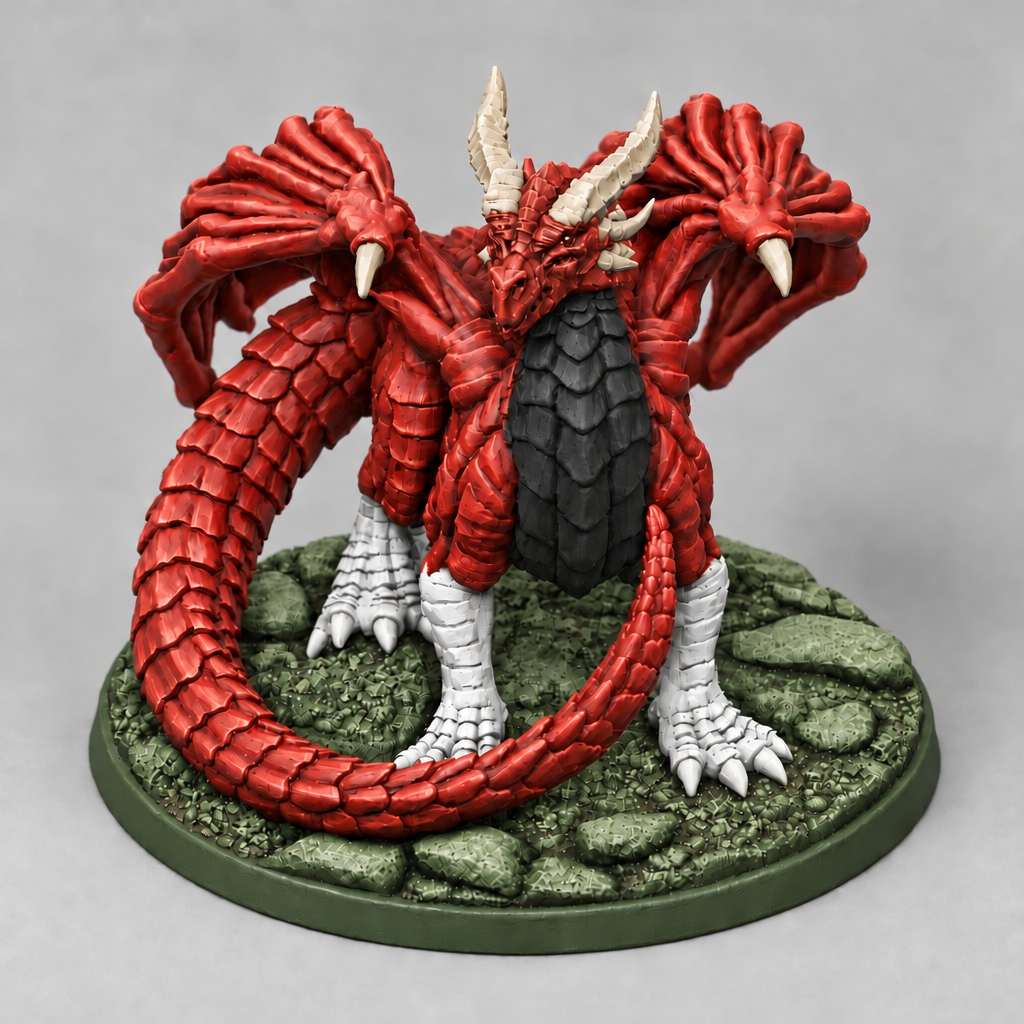
- 1Drybrush pale moss over the rock tops, working away from the figure.
Paints- Forest greenBase ground and rocks: Forest green on the rocks and base top
- Green washBase ground and rocks: Green wash into the rock recesses
- Pale mossBase ground and rocks
Tips- Drybrush lightly so the green stays dominant.
Avoid: Drybrushing towards the figure and dusting the scales.
When it's done: Base is forest green with green wash shadows and pale moss tops.
- 20 min hands-onwaits 30 min insidethen leave it 24 h before handlingGood place to stop
Step 9 of 9 · Varnish and tufts
Matt varnish the whole figure, then add gloss to the eyes and tufts to the base.
- 1Spray matt varnish over the whole figure and base.
- 2Apply a small gloss dot to each eye once the matt varnish is dry.
- 3Add static grass tufts to the rock recesses on the base.
Paints- Matt varnishwhole piece
- Gloss varnishHead and snout: Gloss on the eyes only
- Static grassBase ground and rocks
Tips- Keep the tufts sparse so the rocks still read.
Avoid: Adding tufts before varnishing, which lets them come loose.
When it's done: Finished red dragon with glossy eyes, matt scales and a green rocky base with tufts.
How-to notes
Texturing the base (before priming). If the base is flat, brush on white glue or texture paste and sprinkle sand and a few small stones, then let it dry for a few hours, ideally overnight, before you prime, so the primer locks it all down. Keep the texture off the feet and the edge of the base.
Spray priming. Warm the can in warm (not hot) water, and shake it for two minutes after the ball starts to rattle. Spray from 20–30 cm away in short passes that start and end off the model, turning it so every side, including underneath, gets a light, even coat; two light coats beat one heavy one. Avoid cold, damp days, which leave a dusty or frosted finish. Let the primer dry for about an hour before you brush paint on; when grey and white spray coats follow, spray them after 20–30 minutes instead.
Zenithal (light from above). Over the black primer, spray mid grey from about 45° above, walking all the way round the model, so everything that faces up or out turns grey while the undersides stay black. Then spray white from about 30–45° above, in short bursts, again walking all the way round. Every top, upper edge and raised texture goes bright white, and so does the upper third to half of every wall and side: each side fades from white at the top, through grey, to black at its foot. Black stays only in deep recesses, cracks, under arches and on undersides. White sprayed only from straight overhead lands on the tops alone and leaves the walls dark; if the grey or white reaches the undersides, the effect is lost. On a filament print, light from above catches every layer line on domes and slopes, so filler-prime and sand those first.
Picking a brush. Use the biggest brush that fits the area. That means a cheap flat or round (size 4 or more) for scenery basecoats and washes, a size 1–2 round with a good point for most figure work, a size 0 only for eyes, dots and the finest edges, and an old or splayed brush kept just for drybrushing. A brush that holds a sharp point when wet matters more than a tiny one.
Thinning paint. For basecoats and layers, add water a drop at a time until the paint flows smoothly and leaves no ridges, about like whole milk, and wipe the excess off on the palette edge before touching the model. Two thin coats look better than one thick one. Do not thin washes, one-coat shading paints or drybrush paint: use those as they come. Allow about double the drying time in a cold or damp room; a fan speeds it up. Never put a hair dryer on glue, texture paste or a wet wash.
Tinting with washes and glazes. Over a light-from-above undercoat, brush a coloured wash or well-thinned paint over the whole area so the black, grey and white beneath show through as shadow and light. Use thin coats, let each one dry, and add a second coat only where you want a stronger colour. On big flat surfaces wipe off the excess, because puddles dry as rings.
Basecoating small parts. Use a pointed brush with only a little paint on the tip, brace your hands against each other or the table, and pull the paint along the part rather than dabbing. Do the deepest parts first and the parts that stick out last, and fix slips with the neighbouring colour once they are dry.
All-over wash. Brush a wash over a whole area and let it run into every recess, then wick off puddles on flat areas with a clean, barely damp brush. Do one section at a time and do not touch it while it dries (30–60 minutes), or it leaves rings. A wash over a very dark basecoat barely shows, so wash mid tones, not near-blacks.
Edge highlighting. Run the side of a pointed brush, lightly loaded with normal-consistency paint in a pale version of the colour, along the sharpest edges only: blade edges, plate rims, cloak hems, the tops of folds. Thin lines on a few edges look better than thick lines on all of them.
Recess shading. Instead of covering everything, run the wash only into the creases: under belts, around buttons, in the deep folds, and in the eye sockets and under the nose and lip. Use a pointed brush. It keeps the raised areas clean and bright, which matters on faces and light cloth.
Eyes. Paint each eye socket dark brown, then a small off-white line or dot for the eyeball, then a dark dot in the middle for the pupil, with both pupils looking the same way. Tidy the lids with the skin colour, and do all this before the final skin highlights. Use your finest brush with very little paint and expect a couple of tries; at 28–32 mm a neat dark line is fine too.
Tidying up. Once the paint is dry, paint over slips with the colour that should be there, using a small brush and thin paint, two coats if needed. Tidying is part of the job, not a sign of failure.
Drybrushing. Load an old flat or round brush, wipe almost all the paint off on a paper towel until it barely marks the towel, then brush quickly and lightly across the raised detail, not along it, so only the edges catch colour. Build up with several light passes, and finish with a paler pass on just the top edges. Drybrush rough texture (stone, bark, fur, hair, chainmail, ground), never faces or smooth cloth.
Varnishing. Once the paint has dried for a few hours, ideally overnight, seal the piece with matt varnish in light coats: spray from 20–30 cm outdoors on a dry, mild day (not cold, not humid), or brush it on thinly. Brush the gloss spots on half an hour after the matt, only where something should shine wet: eyes, gems, water, ice, blood.
Ground, tufts and grass. Glue tufts, static grass or scatter on after varnishing, over the cured matt coat (spray varnish frosts them), pressing them into small blobs of white glue or superglue. Put more at the edges and against rocks than in the open. A few clumps look natural; a full carpet hides the work. Static grass and grass tufts are green: on snow, frost or ice use white snow tufts or snow flock instead. Leave white glue overnight before you tip the piece or brush off loose grass, and don't breathe in static-grass fibres.