
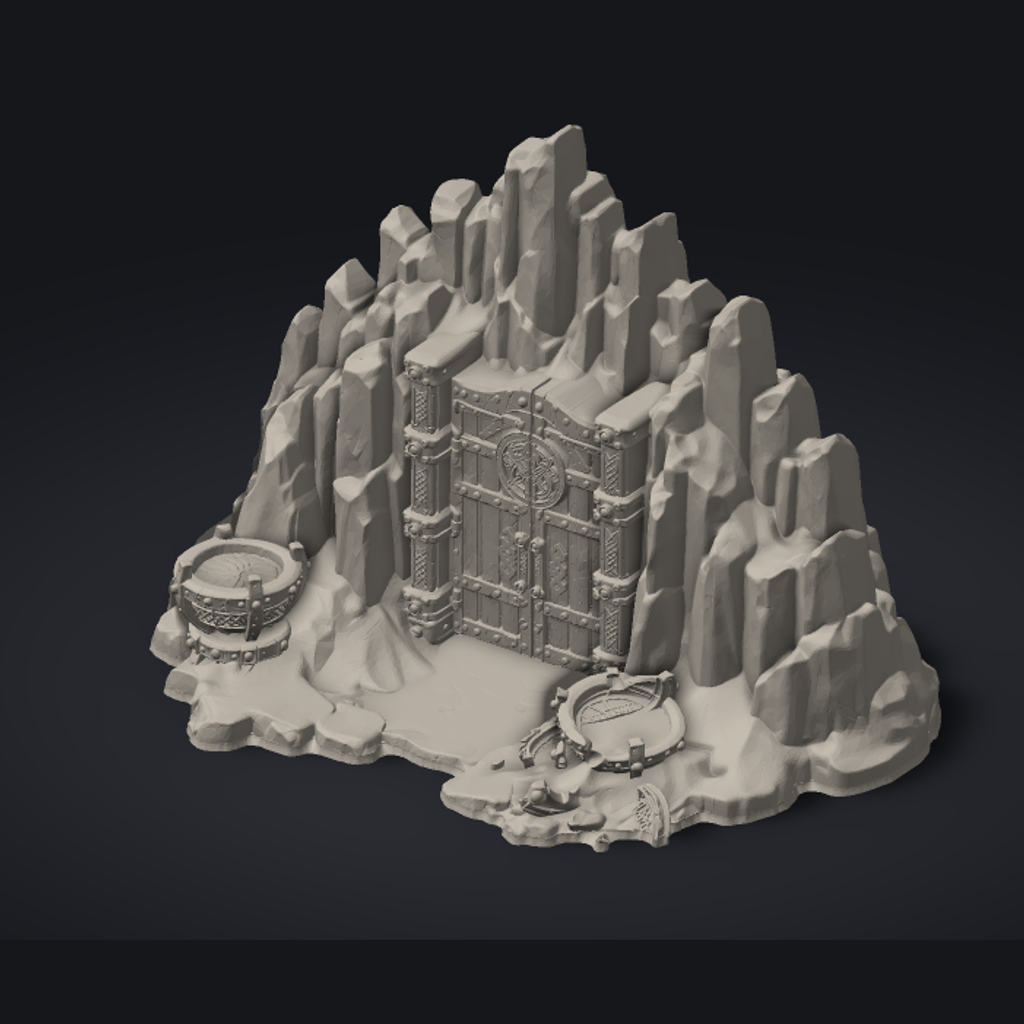
Glacier Giant's Iron Tomb
A pale blue glacial wall rising from a frozen plinth, its translucent-looking ice washed soft blue with white frost in the crevices, framing a heavy riveted iron double door with dark, worn steel and rust-touched braziers at the foot of the steps.
Prime black, then grey and white from above; thin colour lets the light show through.
Guide by @tbrianjones · Oct 25, 2026 · Version 1Colour scheme
| Area | Colour | Paints |
|---|---|---|
| Ice wall | IceGloss varnish on the ice only. | Pale blue (base)Blue wash (shading)White (edges) |
| Frozen plinth and steps | IceGloss varnish on the ice only. | Pale blue (base)Blue wash (shading)White (edges) |
| Iron gates | Steel | Steel (base)Black wash (shading)Bright silver (edges)Bright silver (highlight) |
| Iron bands and rivets | Steel | Steel (base)Black wash (shading)Bright silver (edges)Bright silver (highlight) |
| Iron braziers and debris | Dark ironFor rust, sponge on dark brown, then rust orange, then a few specks of bright orange. | Gunmetal (base)Black wash (shading)Bright silver (edges)Steel (highlight) |
| Frost and snow | IceKeep snow and frost matt: no gloss. Use snow tufts, snow flock or texture, never static grass. | Pale blue (base)Blue wash (shading)White (edges) |
What you need
- Spray primer (black and white)
- Brush-on primer or thinned black
- Medium synthetic brush
- Fine detail brush
- Stiff drybrush
- Sponge
- Matt varnish (spray)
- Gloss varnish (brush-on)
- Snow tufts or snow flock
- PVA glue
- Texture paste
- Wet palette
Safety
Spray primer and varnish outdoors or in a well-ventilated space, and keep the can away from heat.
- 15 min hands-onwaits 3 h insidethen dry 30 minMedium synthetic brush
Step 1 of 10 · Texture the base and prime
Build a frozen texture on the plinth and steps and prime the whole piece black.
 I printed this onPrinted on filament (PLA):
- Snip off the supports and the brim, and trim the elephant's foot (the flared first layers) with a hobby knife; deburr the bottom edge so the base sits flat.
- Clean support scars, strings and seam blobs with a knife or file. Sand only smooth faces, 220 grit then 400; leave textured stone, bark and ground alone.
- Wash it in warm soapy water to remove finger oil and release agent, rinse, and let it dry fully in front of a fan: never a hair dryer or heat gun, which soften filament (PLA at about 55–60 °C).
- Glue any separate parts together now, so the primer seals the joins.
- On big smooth faces, a filler primer hides layer lines: spray it, let it dry for a few hours, sand at 400 grit and repeat if the lines still show.
- Mount it on a cork or an old pot with poster tack so you never hold the print, and spray only on a dry, mild day.
Safety: Wear a dust mask when sanding filler primer.
On this piece: The ice spires and the iron gate leaves carry the most layer lines and possible support scars, so check the upper spires and the back of the gate. The gate bands, rivets and sigil panels are fragile on the thin edges, so glue any loose fittings before priming. Braziers and the broken rubble on the right are small, so keep them off the shelf while painting the wall.
- 1Press texture paste onto the flat plinth and the steps with an old brush, dabbing to make rough, cracked ice.
- 2Leave it to set overnight.
- 3Remove any support scars and burrs with a knife before priming.
- 4Spray the whole piece black, covering the cracks and the undersides of the gate sigils.
Paints- Texture pasteFrozen plinth and steps: Stipple texture paste over the flat plinth and steps to give broken frozen ice, then leave to set.
- Black spray primerwhole piece: Prime the whole model black from above and all sides.
Tips- Check the rivet heads are clean of primer blobs.
- Spray the grey and white within about an hour of the black, or wait until the next day: some hardware-store primers wrinkle if recoated in between.
Avoid: Priming before the texture paste has set, which lifts it off the base.
When it's done: Whole piece primed black; plinth and steps carry a rough texture; ice wall, gate and braziers all black primer.
- 15 min hands-onthen dry 30 min
Step 2 of 10 · Zenithal underpaint
Establish light and shadow from above so the ice and iron read as lit from the top.
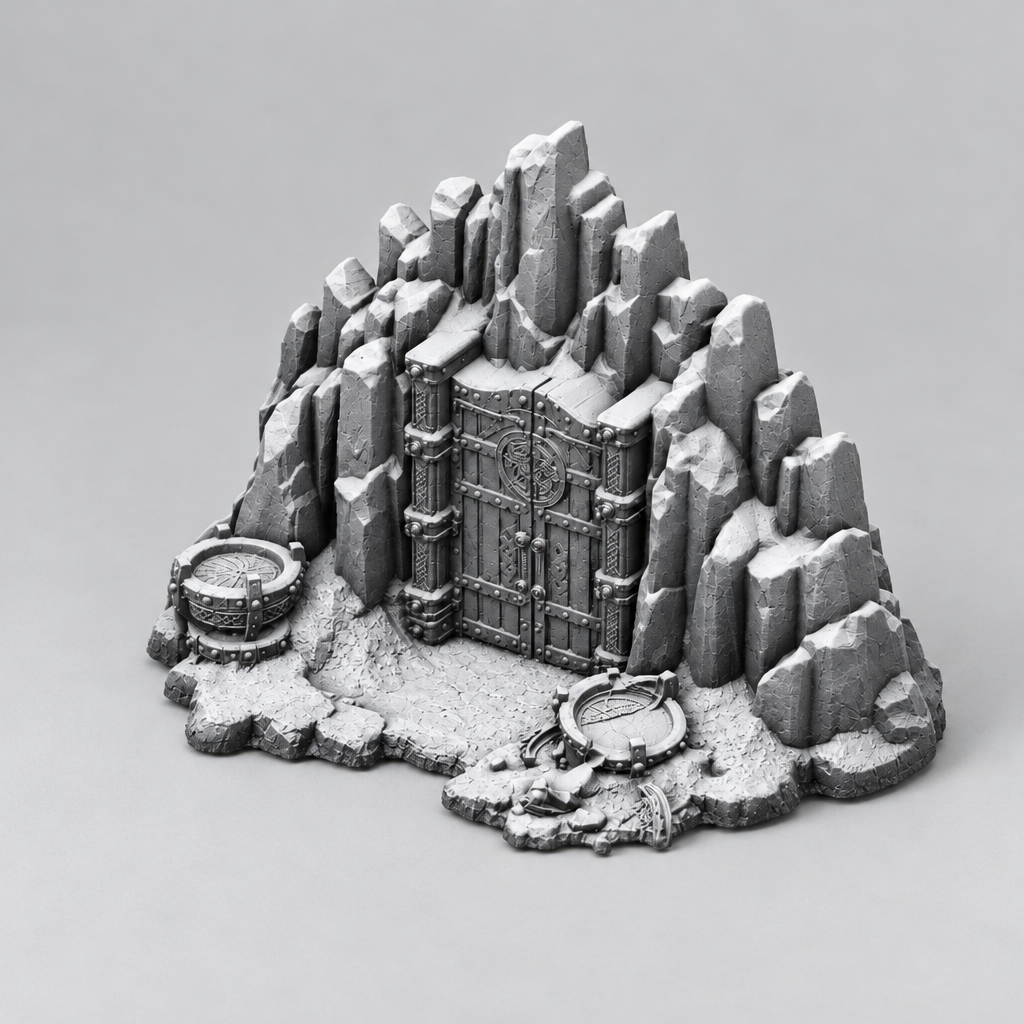
- 1Spray grey from about 45 degrees above the model so the upper faces of the spires, the top of the gate and the step edges catch the light, with the lower faces and crevices left black.
- 2Follow with a thin white from straight above, so only the top-facing surfaces brighten.
- 3The deepest cracks in the ice and the recesses behind the gate must stay black.
Paints- Grey spray primerwhole piece
- White spray primerwhole piece
Tips- Rotate the model slowly under the spray to keep the shading even across the spires.
Avoid: Spraying the white too heavily so the crevices lose their black depth.
When it's done: Whole piece zenithal: black shadows, grey mid sides, white catching the top-facing surfaces of ice, gate and steps.
- 30 min hands-onthen dry 30 minMedium synthetic brush
Step 3 of 10 · Ice and iron basecoat washes
Lay the pale blue ice colour over the wall and tint the iron with a dark steel base.
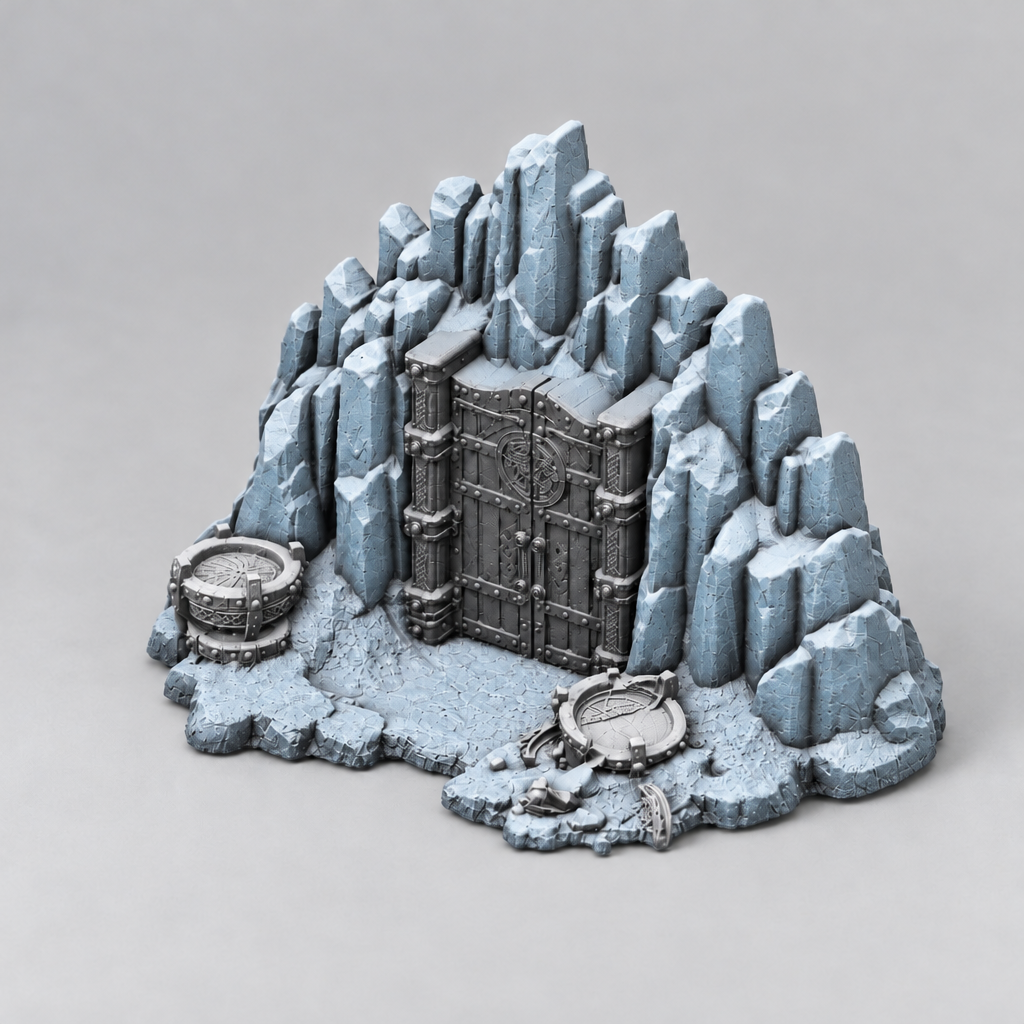
- 1Thin the pale blue to a glaze and work it over the ice wall and the plinth in long vertical strokes, following the ribs of the spires.
- 2Keep 10–20% of the spire faces lighter by glazing only some of them, so the wall does not read as one flat colour.
- 3Glaze the gate leaves with thin gunmetal so the iron becomes a dark steel, leaving the rivets and sigil edges catching the grey.
Paints- Pale blueIce wall: Thin pale blue glazes over the ice wall, leaving the white highlights and black crevices showing through.Frozen plinth and steps
- GunmetalIron gates
Tips- Let the black crevices show through the glazes for depth.
- Glaze the rivets separately so the bolt heads stay bright.
Avoid: Thinning the blue too little, so it covers the zenithal highlights completely.
When it's done: Ice wall and plinth pale blue over the zenithal shading; gate leaves dark gunmetal with grey catching the rivets; braziers still in primer.
- 25 min hands-onthen dry 20 minFine detail brush
Step 4 of 10 · Braziers, steps and gate fittings
Paint the small iron parts and the frost on the steps.
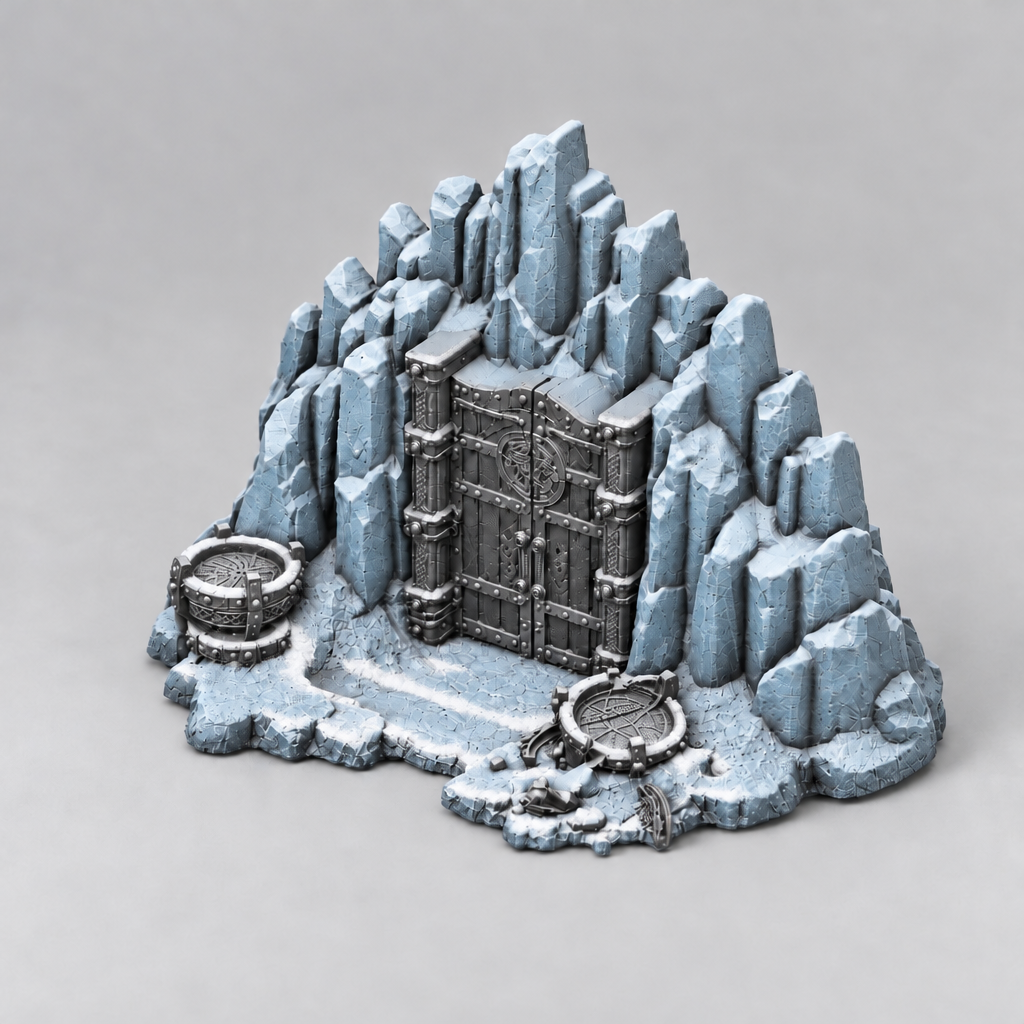
- 1Paint the braziers and the rubble in gunmetal, covering the bowl interiors and the snapped rims.
- 2Paint the gate bands and rivets steel so they stand out from the dark leaves.
- 3Dab a little white onto the step edges and the rubble tops to give frost, keeping it to the upper surfaces only.
Paints- GunmetalIron braziers and debris
- SteelIron bands and rivets
- WhiteFrost and snow
Tips- Paint the rivet heads individually so the iron fittings separate from the leaves.
Avoid: Painting the frost over the whole step, which hides the ice texture.
When it's done: Ice wall and plinth pale blue; gate leaves dark gunmetal with steel bands; braziers and rubble gunmetal with white frost on the step edges.
- 25 min hands-onwaits 10 min insidethen dry 30 minFine detail brush
Step 5 of 10 · Iron metallics and wash
Bring the gate fittings and brazier rims to a bright steel and wash the recesses dark.
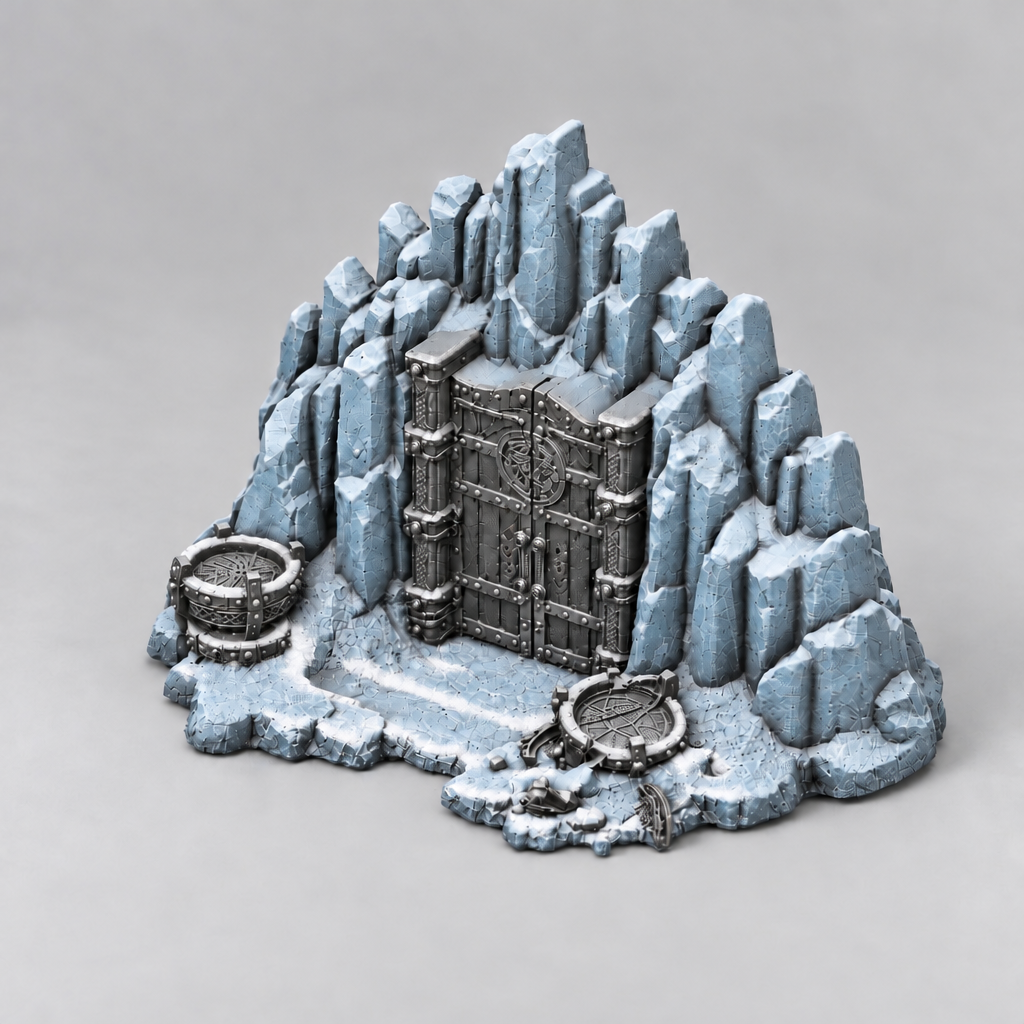
- 1Paint the gate fittings, bolt heads and sigil rims in bright silver first, touching only their top edges, and leave them to dry for ten minutes.
- 2Then wash only the recesses and seams of the gate leaves with thin black wash, so it pools in the grooves around the rivets and never runs over the silver.
- 3For the braziers, wash the bowl interiors and rubble with black wash first, let it dry, then highlight the rims and broken edges with bright silver so the metal stays clean.
Paints- Bright silverIron gatesIron braziers and debris
- Black washIron gatesIron braziers and debris
Tips- Wipe any wash off the silver with a damp brush if it reaches the edges.
- Work the wash from the recesses outward so it stays in the grooves.
Avoid: Washing over the bright silver edges, which dulls the metal.
When it's done: Ice and plinth blue; gate and braziers now dark iron with bright silver rims and black-washed recesses; frost on step edges.
- 30 min hands-onthen dry 20 minStiff drybrush
Step 6 of 10 · Ice layers and iron edges
Bring back the light on the top edges of the ice and the iron.
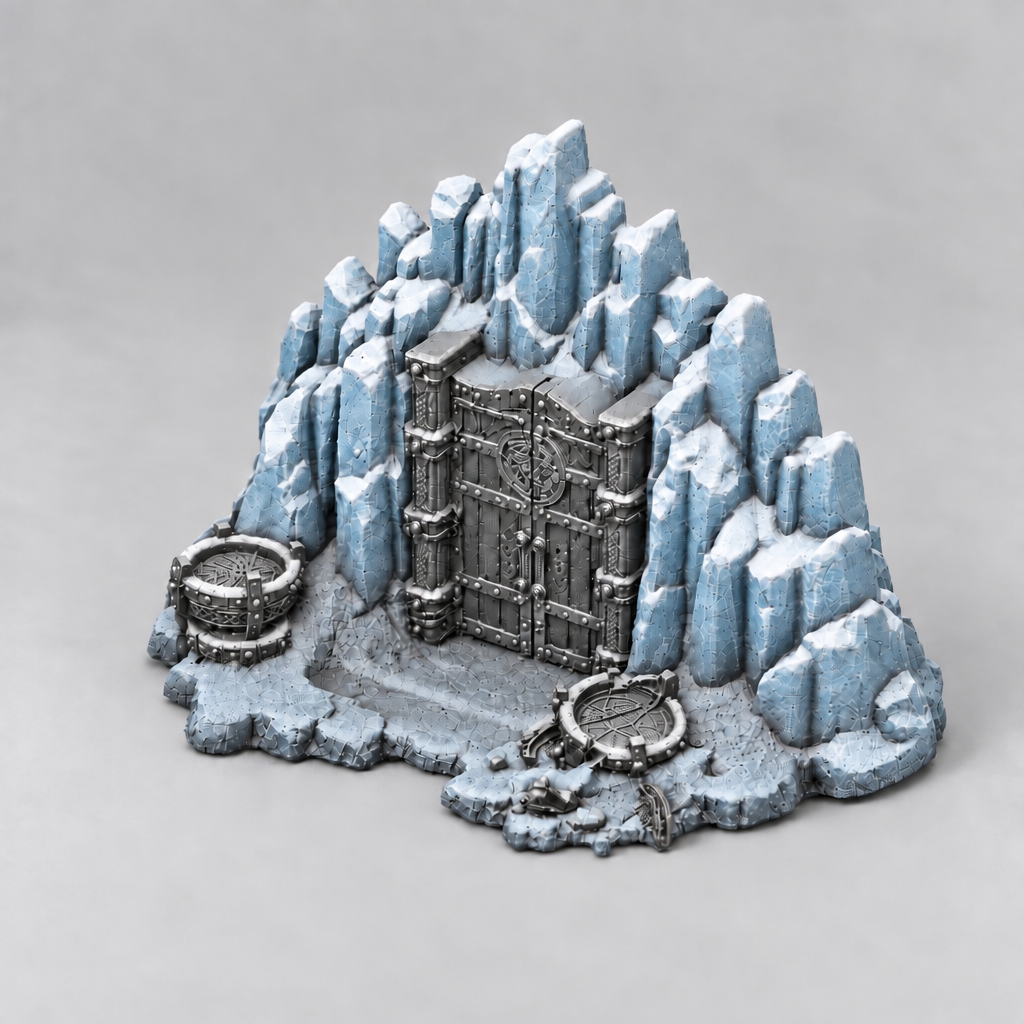
- 1Drybrush white over the upper ribs and the tips of the spires, keeping the strokes across the ice texture so it reads as stacked layers.
- 2Layer thin pale blue bands onto the faces beneath the white, leaving the black crevices dark.
- 3Drybrush steel lightly across the raised edges of the gate plates so the iron catches the light.
Paints- WhiteIce wall
- Pale blueIce wall
- SteelIron gates
Tips- Keep the drybrush dry and light so the ice keeps its translucent look.
Avoid: Drybrushing the ice too heavily, which turns the wall white.
When it's done: Ice wall has white-topped ribs and layered blue bands; gate leaves show steel highlights on the plate edges; braziers and steps unchanged.
- 25 min hands-onthen dry 15 minFine detail brush
Step 7 of 10 · Sigils and glow
Paint the infernal sigils on the gate and the frozen detail on the ice.
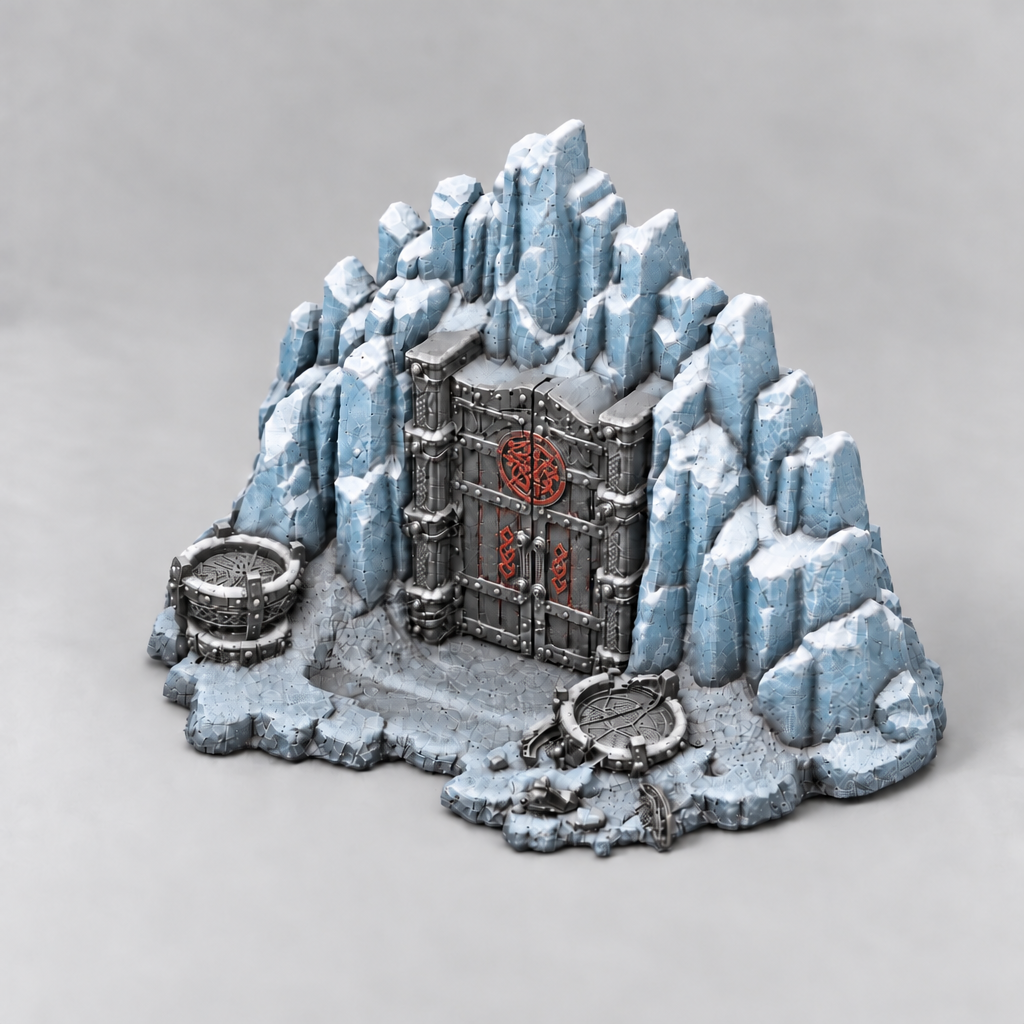
- 1Paint each sigil on the central panels in bright red, following the raised lines and keeping the paint inside the carved edge.
- 2Pick out the knotwork around the sigil circle and the vertical bands in steel so the pattern separates from the dark iron.
- 3Leave the rest of the gate in its dark gunmetal tone.
Paints- Bright redIron gates: Paint the raised sigils across both central panels in bright red, using a fine brush.
- SteelIron gates
Tips- Use a dark red base first if the bright red looks too thin on the raised lines.
Avoid: Letting the red spill into the knotwork grooves.
When it's done: Gate sigils glow red with steel knotwork; ice and iron as before; braziers unchanged apart from steel rims.
- 25 min hands-onthen dry 20 minSponge
Step 8 of 10 · Variation and weathering
Break up the ice colour and add rust to the braziers and gate base.
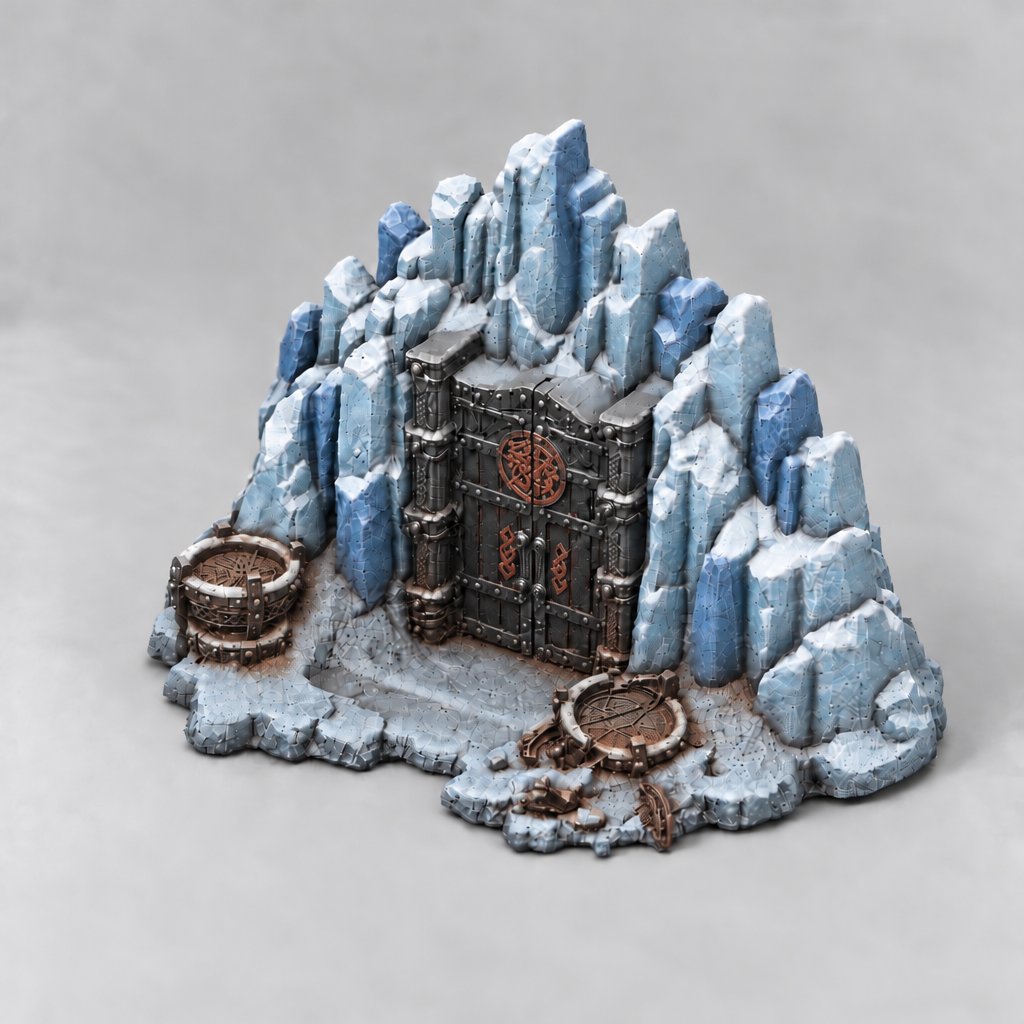
- 1Glaze mid blue across roughly one spire in five, keeping the variation soft.
- 2Sponge brown wash into the brazier interiors and the rubble to suggest old grime, working only over the dry gunmetal and keeping it off the bright silver rims.
- 3Dab rust orange onto the brazier rims and the lower gate edges, then stipple black into the gate corners.
- 4Keep the rust off the ice.
Paints- Mid blueIce wall: Glaze mid blue over a few spires to vary the tone, covering only 10–20% of the faces.
- Brown washIron braziers and debris: Sponge brown wash into the brazier bowls and the rubble for grime, over the dry metal base and clear of the silver rims.
- Rust orange-brownIron braziers and debris
- BlackIron gates
Tips- Use the sponge lightly so the rust reads as patches rather than a solid coat.
- Let the brown wash settle in the bowl interiors before touching the rims.
Avoid: Using too much rust, which overwhelms the steel and makes the gate look orange.
When it's done: Ice wall varied with some deeper blue spires; braziers and rubble brown-grimed with rust; gate lower corners darkened.
- 20 min hands-onthen dry 2 hStiff drybrushGood place to stop
Step 9 of 10 · The frozen ground
Finish the plinth and steps so they read as frozen ground.
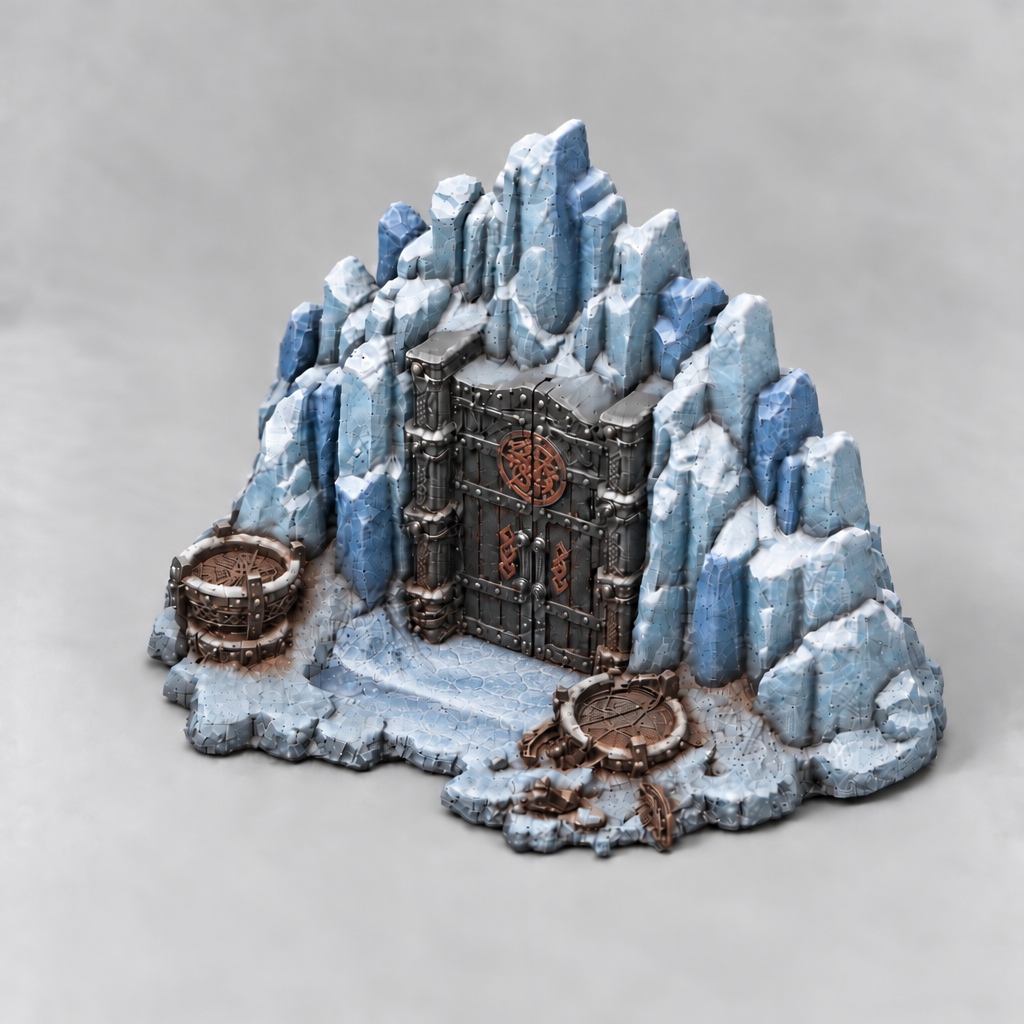
- 1Colour wash pale blue into the textured cracks of the plinth and steps so the ice texture stands out.
- 2Drybrush white across the raised texture of the plinth and steps, keeping the strokes horizontal to suit the flat surfaces.
Paints- Pale blueFrozen plinth and steps
- Blue washFrozen plinth and steps
- WhiteFrozen plinth and steps
Tips- Keep the drybrush light so the blue texture still shows through.
Avoid: Drybrushing the plinth too thickly, which flattens the frozen texture.
When it's done: Plinth and steps pale blue with white drybrush on the raised texture; wall, gate and braziers finished.
- 20 min hands-onwaits 30 min insidethen leave it 24 h before handlingFine detail brushGood place to stop
Step 10 of 10 · Seal and frost
Protect the paint, add the gloss ice spots and finish with snow.
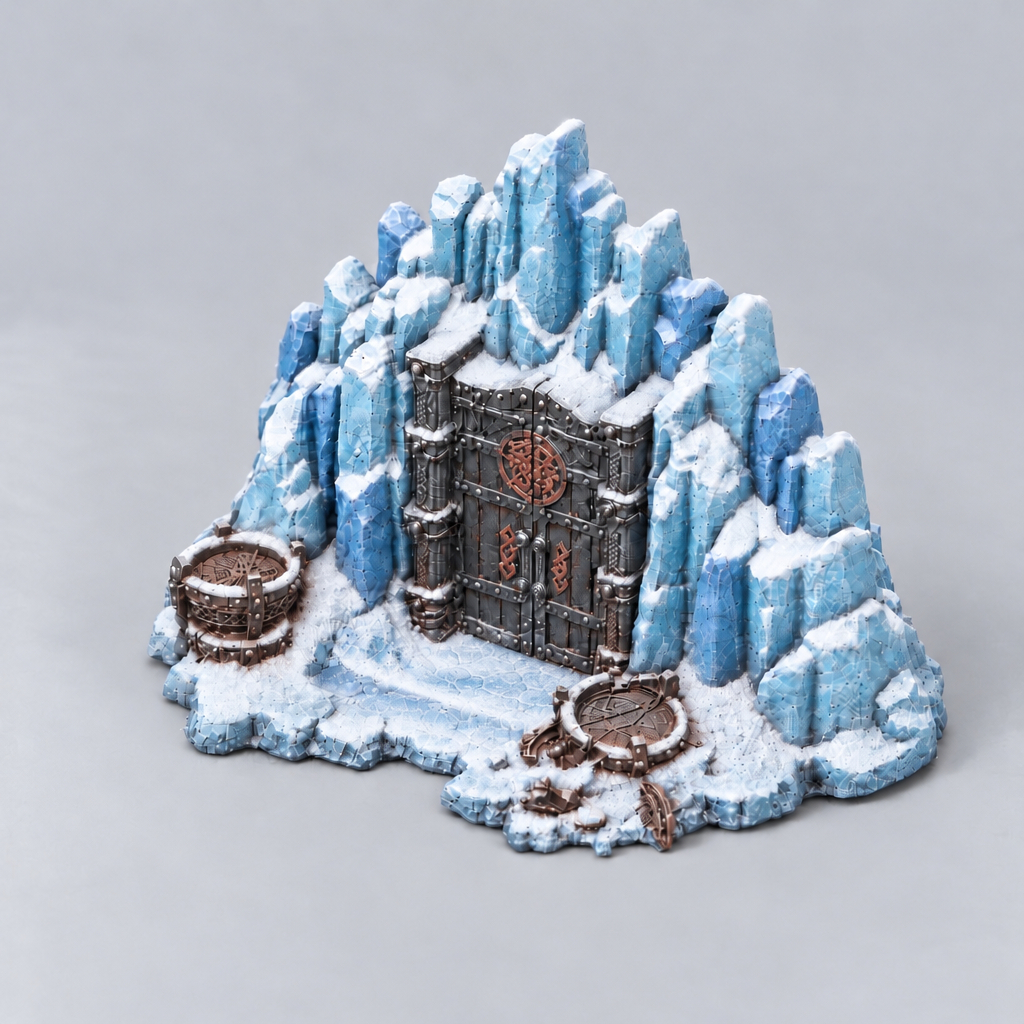
- 1Spray the whole piece with matt varnish and leave it to cure.
- 2Once cured, dab gloss varnish onto a few ice faces and spire tips, keeping the spots small and off the snow.
- 3Add snow tufts and snow flock to the step edges and the rubble, glueing them in place with PVA.
- 4Leave all the snow and frost matt.
Paints- Matt varnishwhole piece
- Gloss varnishIce wall
- Snow tuftsFrost and snow
Tips- Keep the snow matt and avoid gloss on the frost areas.
Avoid: Adding gloss over the snow, which makes the frost look wet.
When it's done: Whole piece finished: blue glacial wall with white frost, dark iron gate with red sigils, rust-grimed braziers, frozen plinth with snow on the steps and rubble.
How-to notes
Texturing the base (before priming). If the base is flat, brush on white glue or texture paste and sprinkle sand and a few small stones, then let it dry for a few hours, ideally overnight, before you prime, so the primer locks it all down. Keep the texture off the feet and the edge of the base.
Spray priming. Warm the can in warm (not hot) water, and shake it for two minutes after the ball starts to rattle. Spray from 20–30 cm away in short passes that start and end off the model, turning it so every side, including underneath, gets a light, even coat; two light coats beat one heavy one. Avoid cold, damp days, which leave a dusty or frosted finish. Let the primer dry for about an hour before you brush paint on; when grey and white spray coats follow, spray them after 20–30 minutes instead.
Zenithal (light from above). Over the black primer, spray mid grey from about 45° above, walking all the way round the model, so everything that faces up or out turns grey while the undersides stay black. Then spray white from about 30–45° above, in short bursts, again walking all the way round. Every top, upper edge and raised texture goes bright white, and so does the upper third to half of every wall and side: each side fades from white at the top, through grey, to black at its foot. Black stays only in deep recesses, cracks, under arches and on undersides. White sprayed only from straight overhead lands on the tops alone and leaves the walls dark; if the grey or white reaches the undersides, the effect is lost. On a filament print, light from above catches every layer line on domes and slopes, so filler-prime and sand those first.
Picking a brush. Use the biggest brush that fits the area. That means a cheap flat or round (size 4 or more) for scenery basecoats and washes, a size 1–2 round with a good point for most figure work, a size 0 only for eyes, dots and the finest edges, and an old or splayed brush kept just for drybrushing. A brush that holds a sharp point when wet matters more than a tiny one.
Tinting with washes and glazes. Over a light-from-above undercoat, brush a coloured wash or well-thinned paint over the whole area so the black, grey and white beneath show through as shadow and light. Use thin coats, let each one dry, and add a second coat only where you want a stronger colour. On big flat surfaces wipe off the excess, because puddles dry as rings.
Glazing (tints and variation). A glaze is paint thinned until it is nearly see-through, brushed over an area to tint it without hiding what is underneath. Use it to shift the colour of 10–20% of the stones or planks, to warm a cheek, or to smooth a rough highlight, and let each coat dry before the next.
Basecoating small parts. Use a pointed brush with only a little paint on the tip, brace your hands against each other or the table, and pull the paint along the part rather than dabbing. Do the deepest parts first and the parts that stick out last, and fix slips with the neighbouring colour once they are dry.
Metallic paints. Stir metallic paint well and apply two thin coats with its own brush and water pot, because the metal flakes get into everything. Shade it with a dark wash, then pick out the edges with a brighter metal. Matt varnish dulls metal, so you can brush a little gloss or satin varnish back onto the metal at the very end.
All-over wash. Brush a wash over a whole area and let it run into every recess, then wick off puddles on flat areas with a clean, barely damp brush. Do one section at a time and do not touch it while it dries (30–60 minutes), or it leaves rings. A wash over a very dark basecoat barely shows, so wash mid tones, not near-blacks.
Drybrushing. Load an old flat or round brush, wipe almost all the paint off on a paper towel until it barely marks the towel, then brush quickly and lightly across the raised detail, not along it, so only the edges catch colour. Build up with several light passes, and finish with a paler pass on just the top edges. Drybrush rough texture (stone, bark, fur, hair, chainmail, ground), never faces or smooth cloth.
Layering. Repaint the raised parts of an area in its base colour, then a smaller area of a lighter tone, leaving the darker wash showing in the recesses. Keep the paint thin, use the side of the brush on folds and muscles, and think about where the light comes from (usually above).
Glow (a light source). Paint a glowing part as light, not as a material: deep orange over the whole area, then orange, then yellow on a smaller area towards the hottest point, and a dot or line of near-white where it is hottest. Each layer covers less than the one before; a magic glow follows the same ramp in its own colour, from deep to near-white. As a late step, glaze thinned orange onto the nearby surfaces that face the glow (a hand, an anvil, the ground), strongest close to the source and fading with distance, and keep the rest of the piece darker so the glow has something to contrast with. Never put metallic paint, verdigris or a metal highlight over a glowing area.
Sponge weathering. Tear a small piece of coarse sponge, dab it in paint, dab most of it off on a paper towel, and press it lightly where wear would happen: edges, corners, lower parts. Go from dark to bright (dark brown, then rust orange, then a few bright specks), and stop before it covers more than it shows. On figures and tiny parts, stipple with the tip of an old brush instead.
Varnishing. Once the paint has dried for a few hours, ideally overnight, seal the piece with matt varnish in light coats: spray from 20–30 cm outdoors on a dry, mild day (not cold, not humid), or brush it on thinly. Brush the gloss spots on half an hour after the matt, only where something should shine wet: eyes, gems, water, ice, blood.
Ground, tufts and grass. Glue tufts, static grass or scatter on after varnishing, over the cured matt coat (spray varnish frosts them), pressing them into small blobs of white glue or superglue. Put more at the edges and against rocks than in the open. A few clumps look natural; a full carpet hides the work. Static grass and grass tufts are green: on snow, frost or ice use white snow tufts or snow flock instead. Leave white glue overnight before you tip the piece or brush off loose grass, and don't breathe in static-grass fibres.